Checklist: What to Pack for a Full-Day Country Hike in Changeable Weather
A season-by-season packing checklist for a full day on rural trails: layers, waterproofs, navigation,...

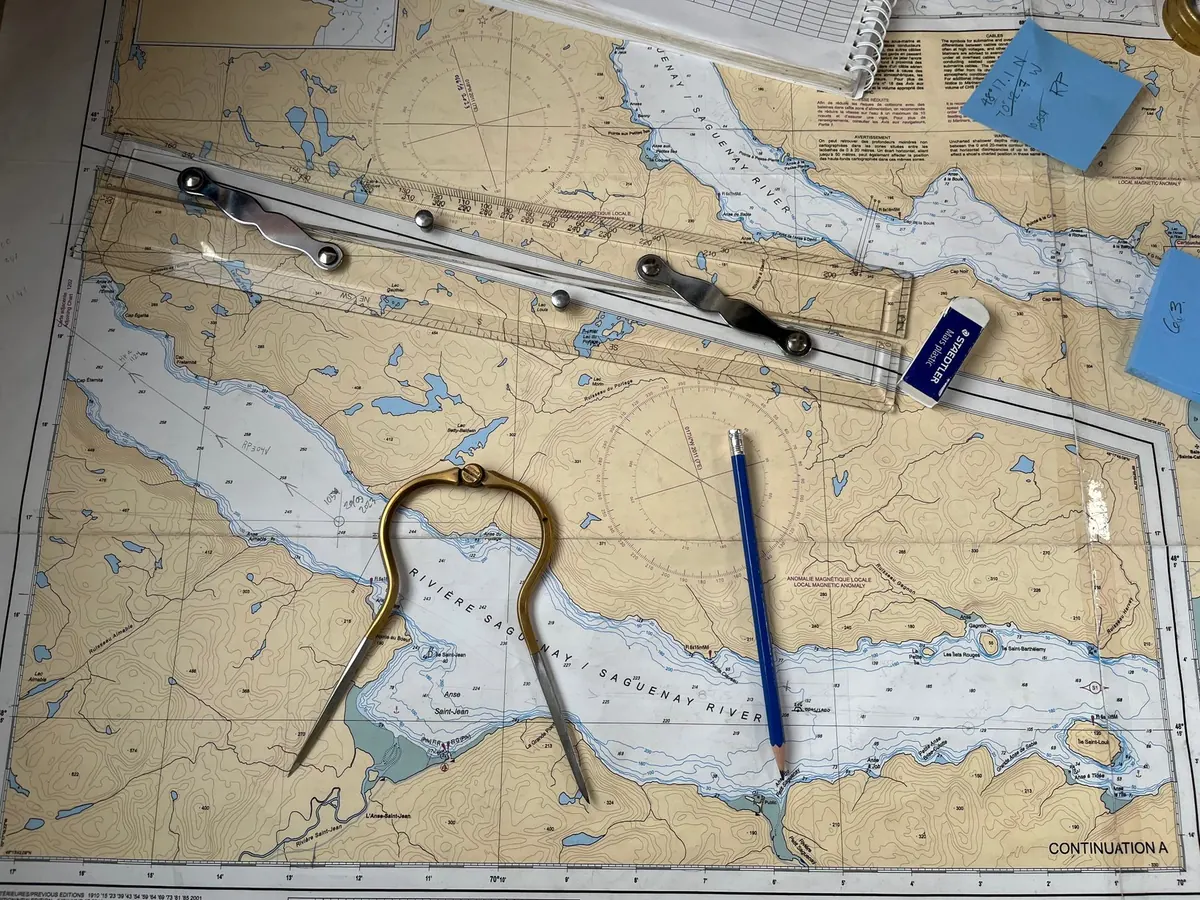
A folded map in a jacket pocket is still the most dependable piece of kit on a country walk. Batteries flatten, signal vanishes behind a ridge, and the path that looked obvious from the car park can dissolve into bracken within ten minutes. Reading a topographic map is a skill you can pick up in an afternoon and then sharpen for years, and it pays you back the first time the mist comes down or a waymark has rotted off its post.
Before you look at the picture, look at the numbers. Scale tells you how much ground each centimetre covers. On a 1:25,000 map, one centimetre equals 250 metres, so four centimetres is a kilometre. On a 1:50,000 map, one centimetre equals 500 metres, and two centimetres makes a kilometre. That difference matters more than it sounds: the same hill walk can look gentle on one sheet and intimidating on the other simply because the detail has been squeezed or stretched.
The margin is where the honest information lives. Check four things: the contour interval, the date of the survey, the grid reference system, and the magnetic variation note with the year it was calculated. If contours are drawn every ten metres, you can count them to estimate a climb. If they are every five metres, the terrain is flatter and the map is showing finer detail.
Contour lines join points of equal height. They never cross, and they never split. Once you accept that, the map turns from a flat pattern into a three-dimensional landscape you can read at a glance.
Say you are standing at 180 metres and the summit ring is marked 340 metres, with six contour lines between you and it. At a ten-metre interval, that is 160 metres of ascent — roughly the height of a decent church tower stacked four times over. Knowing that before you set off changes what you pack and when you turn around.
A useful drill: cover the place names with your thumb and describe the terrain out loud. "Steep on the north side, a spur running east, a stream in the fold, flat ground at the confluence." Do that for a few square kilometres and the symbols stop being abstract.
Every map series has its own legend, and the differences between them trip up experienced walkers as often as beginners. Spend ten minutes with the key whenever you use a sheet you have not carried before. Rights of way, access land, permissive paths and private tracks are drawn differently, and a green dashed line does not always mean the same thing as a green dashed line on a rival publisher's map.
Certain features earn their keep on almost every walk. Water in all its forms — streams, springs, ponds, marshes — is drawn clearly and rarely moves. Walls and fences make straight lines across the page and straight lines across the ground. Woodland edges, tracks, buildings and power lines do the same job. These are your handrails, and they are the things you should look for first when you are trying to work out where you are.
You do not need to be a navigator with a lifetime of fell experience. You need a baseplate compass, a flat surface, and the ability to do one thing well: take a bearing and follow it.
Bearings are best used in short hops of a few hundred metres, checked against features you can see, rather than as an instruction to walk blindly into a bog. If the ground underfoot contradicts the bearing, stop and trust the ground.
Good route planning on paper is mostly about picking lines you cannot get badly wrong. Follow a wall along a ridge rather than cutting across open moor. Use a stream as a handrail to guide you down a valley. Choose a catching feature — a river, a road, a plantation edge — that tells you unmistakably when you have gone too far, so a small error stays small.
For timing, a rough rule of thumb many walkers use is four kilometres per hour on easy ground, plus about a minute for every ten metres of ascent. Add time for gates, bog, photographs and children. Then add a bit more. A route that fits neatly into the available daylight on paper rarely fits neatly in reality.
Take the map on a walk you already know. Before each turn, predict what you should see: a plantation on the left, a contour line pinching tight underfoot, a stream crossing at the bottom of the slope. Then check whether the ground agrees. That habit of predicting and confirming is what turns map reading from a school exercise into genuine confidence.
If you do lose your place, stop rather than walk on. Find shelter from the wind, spread the map flat, orient it with the compass, and locate the last feature you were certain about. Work forward from there, not from where you hope you are. And always leave your route and expected return time with someone at home, along with a rough grid reference for the finish.
A map is not a substitute for judgement, and it is not a substitute for telling people where you are going. Used together, though, they make the difference between a walk you enjoy and a walk you endure.
Photo: Lea Guerette / Pexels
A season-by-season packing checklist for a full day on rural trails: layers, waterproofs, navigation,...
A practical guide to housing, feeding, milking, and the daily routine that keeps a family milk goat...
A practical guide to organizing a rural tool-sharing circle: recruiting a few neighbors, cataloging...